It's the little things

It's more than a little embarrassing that I've spent the entire afternoon getting enjoyment from the most mundane of tasks: sorting buttons.


But I love buttons.

No, really. I love buttons. Probably a little too much. (Confession: those pictured above are only the ones that made the cut. I had to weed out many that just weren't interesting enough.)

I think it dates back to when I used to visit my Granny and we would play this little game, "Odds or Evens?" She would drag out all of her old buttons -- VINTAGE buttons. Buttons she's had for more years than I've been alive. We'd take turns grabbing a few buttons in one hand and making the other guess if the number of buttons inside was an odd number or an even number. Not exactly Cranium, is it? But we got hours of enjoyment from that little game, and I probably got nearly as much enjoyment from studying each of the buttons and, once in a while, asking my grandmother where one particular button had come from. Most of the time, she didn't remember. But every so often, there was a story there.

Now when my daughters visit her house, they play with those same buttons. I've already staked my claim that she is never to throw those buttons away. Those are among the only possessions of hers that I absolutely MUST have someday.

But for now, I have my own little collection. It's more colorful than Granny's, but not nearly as interesting. Some will be used on pages. But mostly, they'll brighten my craft room and remind me of my childhood and Granny's house.

How sweet it is!

The Christmas rush is over, and I'm off work for another week! Can't get much sweeter than that! My new scraproom is coming together s-l-o-w-l-y, but I did actually get to work in it last night (and I'm even editing photos and writing this post from the scraproom). Still needs shelving and I have a ton of stuff to sort, but at least I have some time to do it this week.

As for other sweet things, here are the Design Team projects I did for Imaginisce this month with their Sweet Cheri line. The reds and pinks and purples in this line were perfect for my older daughter who, coincidentally, only wears those colors. Go figure!


It also works well with those photos that are just, well, sweet! I used the i-Top to create matching brads out of the patterned papers, and I handstitched between them to create the "clock" effect.


I also altered a Bare Elements mailbox that I got on sale a few months ago. With these papers, it will make a great receptacle for Valentines that my girls get. And who knows...maybe I'll even get one myself (hint hint, hubby!).


I created i-Top brads to attach the flag and as a top closure, but I kind of like leaving it open a little to show the cute patterned paper trim on the inside.

There's so much more I'd love to do with this line, but I think I might save a few sheets of paper for Valentine's Day...it only seems fair.

Thanks for stopping by!

A little birdie told me

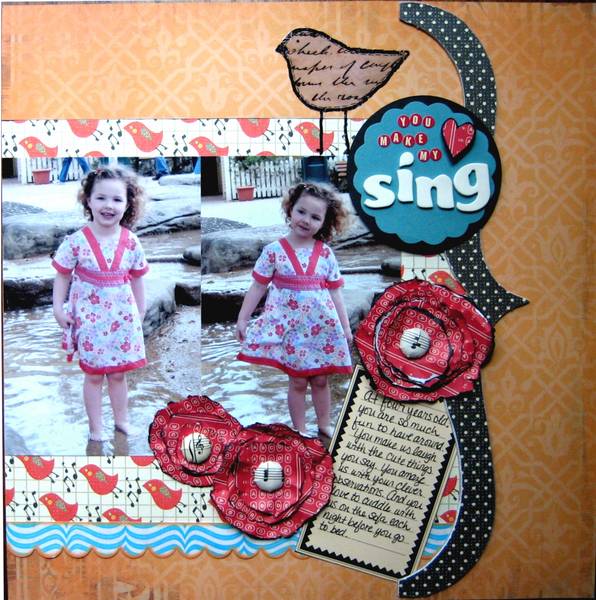
Maybe it's because I share my name with a bird, but I seem to be drawn to all the little birdie papers and embellishments that are out right now. When I first saw the singing bird patterned paper (it's by Scribble Scrabble), I couldn't wait to use it, and it really pulled out the colors in the dress my daughter is wearing in these photos. So I decided to do a little "singing" theme and tie in some old sheet music in the tops of the brads (yes, I used the i-Top!).


The layout is based on a Page Maps sketch, and I actually stayed pretty true to it. I love that big bracket shape, and the dotted paper was the perfect contrast for the bright colors in the layout.
Thanks for stopping by!

Stepping outside my comfort zone

It happens. I get into crafting ruts where I tend to gravitate toward the same techniques or same type of embellishments over and over again. Maybe it's laziness, but I choose to believe I just go with what I'm comfortable with.

So when I opened my Guest Design Team kit from The Mosy Scrapper and found two packages full of embellishments from Gauche Alchemy, I felt a mixture of excitement and panic. Everything from beads and glitter to playing cards and poker chips..it was almost overwhelming to think what I could whip up that would spotlight that assortment of color and texture. But once I started playing with the stuff, it all fell into place.

I decided the little silver beads looked a lot like christmas ornaments, so I created this layout with last year's Christmas photos and the Creative Imaginations holiday line.


This letter "R" was actually an assignment from my boss to "personalize" the letter. I had covered it in the papers a while back, but couldn't decide what else it "needed." The Guache Alchemy kit was perfect. The poker chip was a great symbol of how lucky I feel; the "Admit One" ticket was a symbol of my need to be involved in a lot of things; and the domino symbolized my love of games and the importance of family (my grandfather played dominos almost every day of his adult life).

For the card, I hand-cut a heart out of textured cardstock, applied a light coating of Shimmerz and adhered it to the cardstock. Then I used the beads in the kit to outline the circle. I stitched the red ribbon across the bottom as an accent.


And now...for the winner of my scraproom drawing...

Congratulations to CHERYL!! And thanks for posting a link to your scraproom! Please email me your address (robmab at yahoo dot com) and I will ship out your Pink Paislee paper pack!

::::::squealing with joy::::::::

Oh my! I just saw my name on the Clip It Up blog. I won a Clip It Up mini!!!


Small confession...I've been stalking the Clip It Up blog a bit lately. I've finally accepted that I need serious help in the organization department. My stash has grown considerably this year, and I'm completely out of room. To the point my husband actually suggested I take over our younger daughter's bedroom so I could have the space I needed. Yep, that's right...I'm getting a whole room of my own! Yippee!

And before you decide I'm a selfish mommy for taking away my kid's room, she is now sharing a room with her sister...a BIG room, and they are getting new furniture (bunk beds), so they will have a beautiful space of their own. They pretty much spend all their time together anyway, so they might as well sleep in the same room!

So I'm shopping for scraproom furniture and organizational products, and I'm in need of ideas! If you've posted a link to your scraproom somewhere, would you include a link in the comments section so I can take a look? I would love to see your ideas!

I'll even provide a RAK...a set of Pink Paislee patterned papers...to one lucky poster!

'Tis the Season...

...to be jolly. And I'm trying my best, even though I'm fighting another cold and I just learned that my hard drive crashed and is holding three years of my photos hostage. I'm taking it really well, actually. Or maybe I'm in shock.

Either way, I'm full of Christmas spirit and I'm not letting anything take it out of me. We got the tree up yesterday and I thought it needed a couple more ornaments, so lookie what I made:


They're actually not that hard once you get the hang of it. However, they turned out much bigger than I thought they would. I think these would be beautiful with a bunch strung together in a garland along a mantle or banister, or three or four hanging from a chandelier. Instructions are here.

Now I'm off to shop for a new hard drive...not exactly the holiday gift I had in mind, but I guess there are worse things. Aren't there?

Eeeek! It's December!

How on earth did that happen? My neighbors already have their Christmas lights out! And as usual, I'm running behind. I did manage to get holiday photos take of my girls, and my Christmas Cards are ordered (thank goodness I'm not crazy enough to think I can make my own!). But aside from that, I am SO not ready for the holidays. I need a really strong dose of Christmas spirit...and FAST!

Fortunately, the wonderful folks at Imaginisce were looking out for me and sent me the i-Top Brad Maker (yippee!!) and the Polar Expressions collection to play with. After all, opening that box WAS a little bit like Christmas! And all the snowflakes and coffee mugs and polar bears inspired me to do some Christmas projects.


I used pop-dots on some circles I cut from the patterned paper. Then I used a white opaque pen to add the dots around the sentiment to mimic the design of the circles on the patterned paper.


Finally used my new Martha Stewart punch on the colorful (and glittery!) dotted paper that I just love. The snowflakes were a perfect compliment to my daughters' holiday outfits. The brad in the center of the poinsettia was my first attempt with the i-Top Brad Maker. It's pretty easy once you get the hang of it, and there are so many possibilities...I can't wait to play around with it a bit more.


I used waterproof Mod Podge to adhere patterned paper to this metal tin I found at Michael's.

It was the perfect size to fit three pouches of gourmet coffee mix, but hot chocolate and marshmallows would fit, too!

I discovered that the lid to the tin would make a perfect tray/coaster for a coffee cup! So I embellished it with a few rub-ons.

And that's what I've been up to for the past few days. Who needs Black Friday and Cyber Monday when you've got scrappy goodies to play with?

Thanks for visiting!

Ahhhh...the weekend!

Do you ever look around you and think "What happened?" That's kinda where I am today. My house is an absolute mess. I have no groceries. I can't find any of my clothes. And I'm pretty sure I've forgotten to do about five things this week...but I'm not sure what they are. This isn't good.

On the bright side, my PTA silent auction is over (and it was a success), there's a good chance my job will slow down this week (mostly because no one is working this week) and I have nothing on the agenda for today, tonight or tomorrow morning, so maybe...just maybe...I can start getting caught up again.

Speaking of catching up, here are a couple of projects I finished but never posted. This first one was for a challenge at Scrap-Friendzy. It was a "Thanksgiving Menu" challenge, so I chose items from the menu, then I found out what the corresponding scrapbooking items were that I had to use. So my challenge recipe ended up being:
  • corn fritters = eyelets or brads
  • Ham = 2 photos
  • green bean casserole = 3 different patterned paper with some green in it
  • apple cider = ink
  • cranberry sauce = journaling strips
And here's the layout I did...


It's quickly become one of my "sentimental favorites" because I know that I will look back on this layout someday and smile at how cute my daughter was with her first little crush. I also like the little border I created with the eyelets. I'm finally starting to see the value of my Crop-a-Dile!

Another challenge at Scrap-Friendzy was to create a card with the scraps from your last layout, so I created this card for my coworker, Sharisse, who celebrated her birthday this week.


The papers are by Sassafras Lass and Crate Paper, and the chipboard pieces on the layout are by Cosmo Cricket.

And now, I think it's time to try and straighten up my house...at least enough to find my clothes!

Thanks for visiting!

Little Farmers

It's another rainy Monday, and even worse, I woke up at 5 a.m. -- though my alarm was set to let me sleep until 6. The dreaded cough that has hung on for the past six weeks woke me up again, so I'm calling the doctor today. No more trying to be tough and hoping that Mucinex will fix it eventually. I think six weeks of misery is enough, don't you?

How about a little pop of brightness on this dreary Monday morning? Here's a layout I did yesterday for one of the online crop challenges at Scrap-Friendzy. It was based on a sketch by Jana Eubank, and it turned out completely different than I thought it would...in a good way.


I used the Kenner Road kit from October (Sassafras Lass, Cosmo Cricket and Crate Paper), plus a few things from my Jenni Bowlin "junque box."


These chipboard letters are from the BasicGrey Eskimo Kisses line. I'm lovin' the woodgrain look these days.


I hope your week is off to a better start than mine. Thanks for stopping by!

The Holiday Countdown is on!

If you haven't checked out the "Countdown to the Holidays" crop at Scrap-Friendzy this weekend, you NEED to get over there! There are some really fun and inspiring challenges, each designed to get you ready for the holidays. Just go to the forum and look for the "Countdown Crop" section.

For my challenge, I created a set of holiday gift tags using punches.

I used a circle punch for the snowman, a square punch for the gift boxes, my beloved loopy border punch (by Martha Stewart) for the Christmas tree and the apron lace border punch (by Fiskars) for the "Frosty" tag.

All of the papers are from the Imaginisce Polar Expressions line, which I am giving away to one of my lucky commenters to my last post. Are you ready to find out who it will be?

Are you sure?

Ok...guess I should draw a name. Off to Random.org...

And it is...

Commenter #12 ... Heather Getson!

Heather, please email your address to me at robmab at yahoo dot com. I will get your prize pack out this week. Congrats!!!

Who likes free stuff? Me! Me! Me!

If you're a Facebook junkie like me (or even if you aren't), here's a super easy way to win some free goodies from Imaginisce and Glue Arts (the makers of my new favorite adhesive...the GlueGlider Pro)!

Here's what you have to do...


And because I love a little friendly competition as much as the next girl, leave me a comment below telling me that you're a Facebook fan of Imaginisce and Glue Arts, and I'll enter you into a drawing for some yummy Imaginisce goodies from the Polar Expressions line.

The deadline for my giveaway is midnight (Central time) on Saturday, November 21. I'll draw a winner on Sunday!

Let the games begin!

Feelin' the love

Wow, so many new visitors! Welcome, welcome, welcome!! I hope you'll visit often! And thanks for all the congrats. I can still hardly believe it...it's very surreal.

Last night, I decided to tackle the weekly layout sketch at Paper Popsicles. It was kinda late when I started (probably 9:30 or so), and I got about halfway done and had to go to bed. Too bad, because I was on a bit of a roll and really didn't want to leave it unfinished, but my body was telling me otherwise. So I called it a night.

I finally got back to it this afternoon and it came together really quickly. It's simple, but that's kinda the way I've been scrapping lately. I'm into the K.I.S.S. (keep it simple, scrapper!) methodology!


I really love the colors in these papers. They're by Scrap Within Reach, and they're nice and thick and double-sided...all the things I love in a patterned paper! Plus, the little ticket sticker was perfect for the theme of this layout.


The only downside of this layout is that it really got me craving a Fletcher Corny Dog. It's going to be a long wait until the fair returns next September!

Have a great Saturday!

Cat's Out of the Bag


Phew! It's been a loooooong 24 hours trying to keep this news to myself, but I can finally announce that I've been selected for the Imaginisce Design Team!!!!!

I absolutely love working with Imaginisce products, so this is one of those "dream gigs" I never really expected to get. Even more amazing are the other ladies on the team, some of whom I've been following via blogs and galleries because their work has been so inspiring.

And because I feel the need to share some Imaginisce love, here's the layout I submitted for the tryout.

[photo removed for publication]

Check out the rest of the Design Team on the Imaginisce blog. And have a wonderful weekend!

Squirrely Goodness

My dogs might hate 'em, but I gotta admit: squirrels are pretty darn cute. And when I was trying to figure out what to use on my card for this week's Paper Popsicles blog sketch, a squirrel ended up being just what I needed. (Don't tell my dogs, okay?)


And since, for me, cards are like potato chips -- I can never stop at just one -- I made this one, too. No squirrels here.


Thanks for stopping by! Happy Friday!!

Yummy Deal at Scrapbook Steals!

Check out this yumminess from Pink Paislee...


It's their Creative Christmas line, but as a mom of girls, I can see TONS of possibilities for this line outside of traditional Christmas layouts. I just love the colors and patterns!
It's the deal of the day on Scrapbook Steals today...while supplies last. And it's coming to my house for the bargain price of $14.99 + shipping. Woohoo!!!

What's your story?

One of my favorite questions to ask people is: "How did you meet your spouse/significant other?" There's usually a good story there. I remember my grandmother once telling me the story of when she met my grandfather. She described him as "a Rounder" and said that, when she first laid eyes on him, she knew she never wanted to date him. They ended up being married for 49 years...best friends until the day he died.

Maybe it's the romantic in me, but I just love hearing those stories. My story is a little different, but I'm proud of it. After all, it brought me to Adam and there's no happier ending than that. So of course, I created a layout.


I also experimented a little with Shimmerz on the Pink Paislee chipboard. I first painted it in acrylic paint, then alternated coats of Fire Engine Red and Choc-o-lot Shimmerz to give it a nice rich texture.

I've been published!!

I submitted a few layouts to eZines back in September. It was my first time submitting anything for publication, so I really didn't expect much. When I got an email back from Jami Petersen of Scrapbooking.com about publishing one of my layouts, I couldn't believe it. It made the November issue, which you can see here.

Sadly, I haven't had time to submit much since then, but seeing my work highlighted gives me new motivation to get back into submission mode. Maybe I'll even try for a print publication...someday!

Inspiration comes in many forms...

There was a thread on the Paper Popsicles message board earlier this week about where inspiration comes from. I replied that I usually find inspiration in galleries and blogs, then it all becomes a jumbled mess in my brain until it finds its way to the page. Can you tell I'm not very organized in this department?

But once in a while, inspiration comes from somewhere completely different. In this case, it was a combination of (a) a vintage find at my in-laws' house, (b) a special photo that I had tucked away for a while and (c) the weekly sketch challenge on the Paper Popsicles blog.

The vintage find has kind of a cool story. We were at my in-laws' house for dinner on Sunday, and my girls were making their usual mess of toys all over the living room. As I started to make an effort to straighten up the mess, I picked up this little strand of yellowed silk flowers. Immediately, I said "ooooh...these would be perfect on a layout!" So my mother-in-law said "Take them!" She then went on to explain that they had been on the wedding hat of my father-in-law's mother. I just thought they were so beautiful and perfect, I couldn't believe I had the luck to find them that way. And I knew they would be perfect for a photo that I had been meaning to scrap for a while.

The photo has a cool story, too. It's four generations of women in my family: my grandmother (who passed away last month), my mother and my aunt, myself and my two daughters. Somehow, we only have girls in this family. Personally, I think it's because we are all so strong and fiesty...those Y chromosomes never had a chance in this group!

So here's the layout...


It's a little different from my usual fun, bold style, but I like it. I hand-cut the flower and flourish shapes from My Mind's Eye paper, then used them as masks when I sprayed Glimmer Mist for the background.

Here's a close-up of those amazing vintage flowers...


I threw in some elements from a Jenni Bowlin Junque Box -- a book page and a button -- to complement the vintage feel of the flowers.


Thanks for visiting! Have a wonderful weekend!

What a nice surprise!

I love an unexpected, pleasant surprise. So when Paper Popsicles decided to release our Design Team projects for the November kits early as a little pre-Halloween gift, I was delighted. Mostly because it answered my question, "What am I going to post today?" But also because I can't wait to buy the Jolly By Golly kit (the one I didn't get to work with this month...the one that includes all those yummy Cosmo Cricket papers) to make Christmas cards -- now that I'm in the Christmas spirit and all. (wink, wink)

As for the kit I *did* get to work with, well, it rocked! It's called Seasons of Color. Admittedly, we don't get a lot of "fall color" here in Texas. But when I put my not-so-fall-colored photos with these vibrant fall papers, it actually makes them seem a little more fall-ish. Take a look...


And here are the three cards I made with the kit:


The specialty papers in this kit are amazing: the scalloped circle and the lace acorn paper are from Little Yellow Bicycle, and the orange doilie paper is from BasicGrey. I'm pretty happy with myself for making ONE sheet of the BasicGrey paper last through two layouts and two cards...that has to be some sort of a record, doesn't it? (Well, at least for me it is.)

Photos of all the November kits and projects are in the Paper Popsicles Gallery. Check it out!


Thanks for looking!

60 Days and Counting...

Can you believe it? Only 60 shopping days left until Christmas?! Yes, I know it's annoying to walk into the nearest shopping mall to sounds of Perry Como and strands of glistening lights when we haven't even gotten Halloween out of the way yet. But that's how it is, and I couldn't resist adding a little "holly jolly" to my blog on this cold, rainy afternoon.

Here's a fun little home decor project I did this weekend using the Polar Expressions line from Imaginisce. I just love that little polar bear feltie and, the moment I saw him, ideas started brewing in my head. Yes, that can sometimes be dangerous. But in this case, all turned out well and I ended up with a new piece of holiday decor.


I made the tree by cutting strips of the green paper (which conveniently has diagonal stripes all over it) and trimming the edges parallel to the diagonal in different lengths. I then stacked them on top of each other to form the tree. The lights and peppermint decorations are actually rub-0n borders that I cut up.


The presents were just cut with a square punch, then I trimmed a bit off the top to make them more rectangular. That's Imaginisce ribbon, and it's double-sided, so the same ribbon was used on both packages...just different sides.

I even made the fireplace out of Imaginisce papers. I liked the way the red words lined up to seem a little like bricks. Reminds me a little of the fireplace in the house where I grew up.


The sentiment, stockings and peppermint on top of the tree are all chipboard from the Imaginisce Polar Expressions line, too. Are you sensing a pattern here? :)

To finish off the project, I wanted something to spice up the somewhat boring frame I bought at Michael's, so I took more Imaginisce ribbon, trimmed it into pieces, ran it through my Xyron "X" and adhered it onto the frame to create a border.


Since the length of the ribbon that came in the package wasn't *quite* long enough to make it all the way around, I finished it off with little chipboard wreath, which I mounted onto the chipboard backing that came in the package of rub-ons. I really love manufacturers who include nice chipboard in their packaging...it's such a bonus!!

And now that I've gotten a jump on my holiday decor, I guess it's time to start thinking about Christmas shopping. Right after I get rid of all this Halloween candy.

Flower Power!

Today, I’m going to show you how to create a sweet little paper flower (like the one I used on my card for the Paper Popsicles blog sketch) using just a few simple tools.


You will need:
  • A circle punch (I’m using a 1 ¼” circle punch)
  • Scraps of paper (double-sided paper creates a neat effect; however, you can still do it with single-sided paper and your contrast color will be white)
  • Adhesive
  • A button or brad for the center of the flower


I’m using the double-sided papers from the Cosmo Cricket Girl Friday line, both of which are still available in the Paper Popsicles store.

1. Punch 6 circles from your scraps of paper.


2. Take one of the circles and fold a small portion of one edge toward the center. Fold the same portion of the other side of the circle toward the center so that you have a petal shape like this.


3. Repeat with the other 5 circles, making sure that the shape of each petal is uniform with the others.


4. Begin adhering the circles onto a layout or piece of cardstock. Align the folded edges together to create a full circle of petals.


5. Finish with a button or brad in the center.

You can also make a stem from ric-rac, ribbon or paper and add some leaves. Perfect for a card, layout or home decor.